Diese Library dient zum ansteuern eines Text LC-Display mit 2×16 Zeichen. Die LIB ist kompatibel mit den Chips : ST7066U, HD44780, SED1278, KS0066U, S6A0069X
Das Display wird im 4Bit-Mode betrieben und benötigt dazu 6 GPIO-Pins zur Datenverbindung. Im C-File können diese beliebig auf die freien Pins eingestellt werden. (Ich habe PE5 bis PE10 benutzt)
Beispielbild :
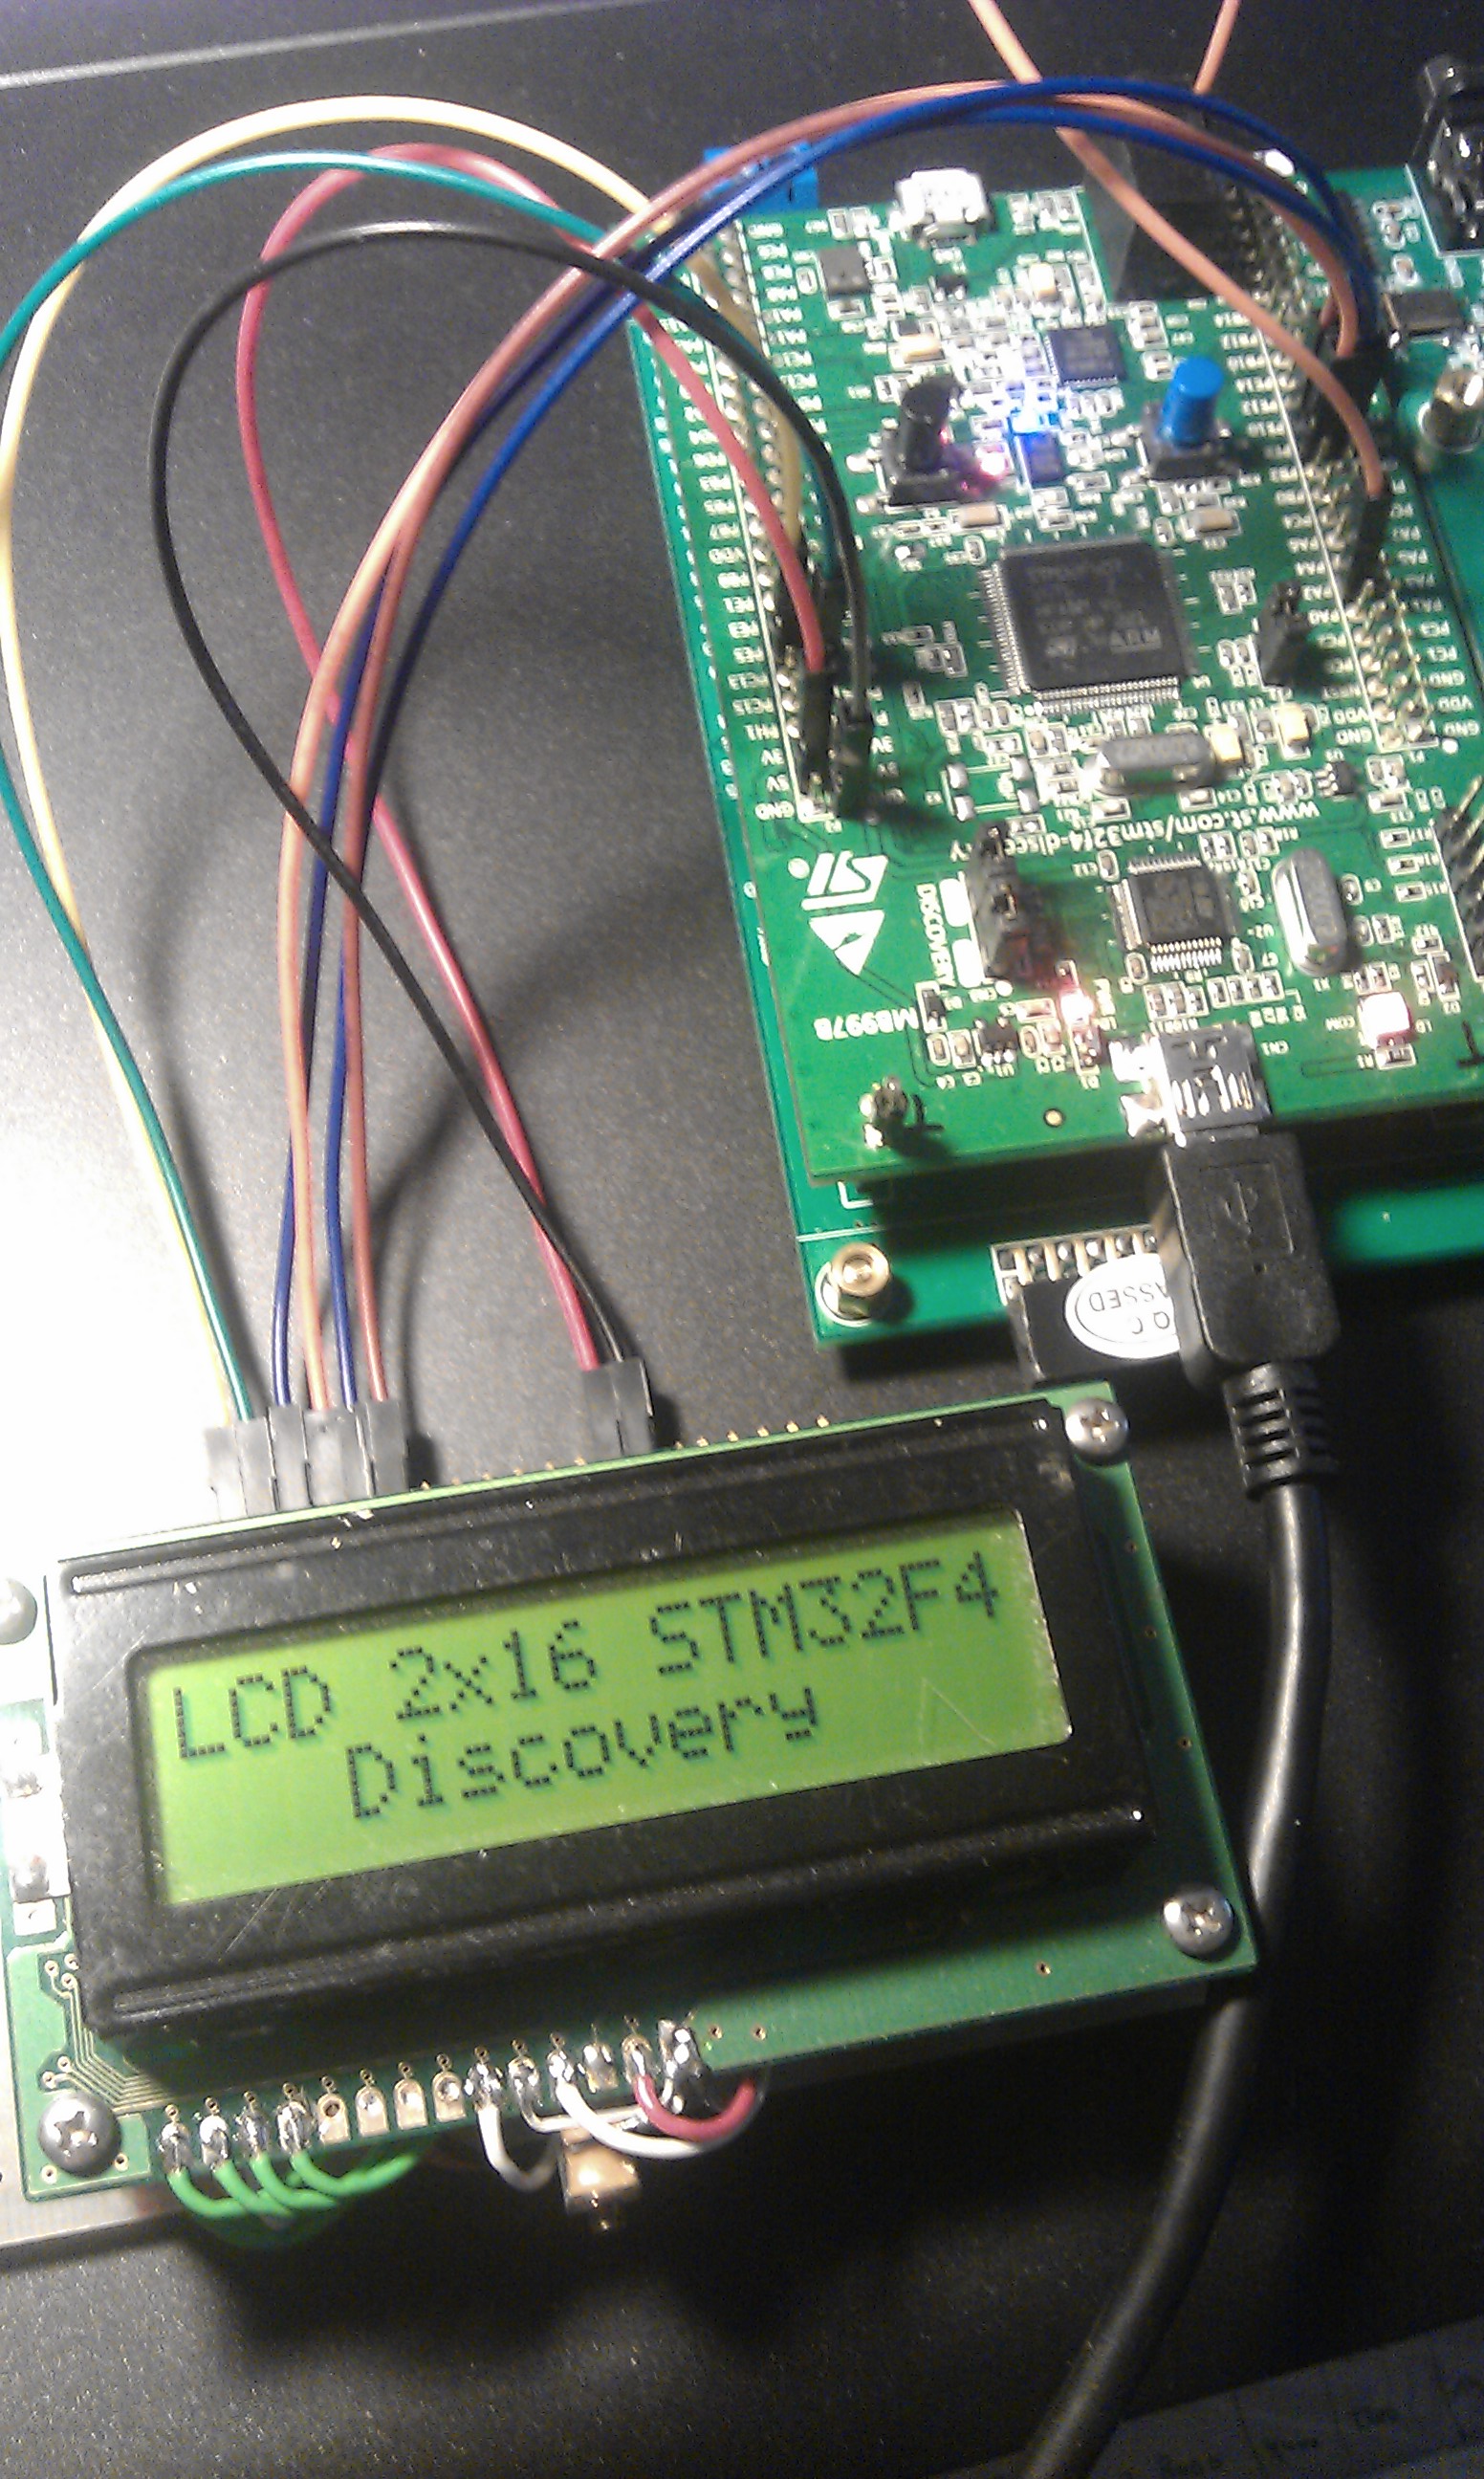
Benutzte Pins :
PE5  -> LCD_RS
PE6  -> LCD_E
PE7  -> LCD_DB4
PE8  -> LCD_DB5
PE9  -> LCD_DB6
PE10 -> LCD_DB7
Voraussetzungen :
1 2 | Benutzte Module der CooCox-IDE : GPIO Benutzte Librarys : keine |
Enumerationen :
1 2 3 4 5 6 | typedef enum { TLCD_OFF =0, // Display=AUS, Cursor=Aus, Blinken=Aus TLCD_ON, // Display=EIN, Cursor=Aus, Blinken=Aus TLCD_CURSOR, // Display=EIN, Cursor=EIN, Blinken=Aus TLCD_BLINK // Display=EIN, Cursor=EIN, Blinken=EIN }TLCD_MODE_t; |
Funktionen :
1 2 3 4 5 6 | void UB_LCD_2x16_Init(void); // um das Display zu initialisieren void UB_LCD_2x16_Clear(void); // um das Display zu löschen void UB_LCD_2x16_SetMode(TLCD_MODE_t mode); // um den Display Mode zu ändern void UB_LCD_2x16_String(uint8_t x, uint8_t y, char *ptr); // zum ausgeben eines Strings an x,y Position void UB_LCD_2x16_WriteCG(uint8_t nr, uint8_t *pixeldata); // zum speichern von Sonderzeichen void UB_LCD_2x16_PrintCG(uint8_t x, uint8_t y, uint8_t nr); // zum anzeigen von Sonderzeichen |
Beispiel :
1 2 3 4 5 6 7 8 9 10 11 12 13 14 15 16 17 18 19 20 21 22 23 24 25 26 27 28 29 30 31 32 33 34 35 36 37 | //-------------------------------------------------------------- // File : main.c // Datum : 17.04.2013 // Version : 1.0 // Autor : UB // EMail : mc-4u(@)t-online.de // Web : www.mikrocontroller-4u.de // CPU : STM32F4 // IDE : CooCox CoIDE 1.7.0 // Module : CMSIS_BOOT, M4_CMSIS_CORE // Funktion : Demo der LCD-2x16-Library // Hinweis : Diese zwei Files muessen auf 8MHz stehen // "cmsis_boot/stm32f4xx.h" // "cmsis_boot/system_stm32f4xx.c" //-------------------------------------------------------------- #include "main.h" #include "stm32_ub_lcd_2x16.h" int main(void) { SystemInit(); // Quarz Einstellungen aktivieren // Init vom LC-Display UB_LCD_2x16_Init(); // Text auf Zeile-1 ausgeben UB_LCD_2x16_String(0,0,"LCD 2x16 STM32F4"); // Text auf Zeile-2 ausgeben UB_LCD_2x16_String(3,1,"Discovery"); while(1) { } } |
Hier die Library zum Download :
Hier der komplette CooCox-Projektordner zum Download :
10 Antworten auf 34-LCD_2x16-Library (STM32F4)
Wie hat Dir dieser Artikel gefallen?
 (Noch keine Bewertungen)
Danke für diese hilfreiche Bibliothek
gerne
Funktioniert super, vielen Dank!
Wenn man
setzt, funktioniert es auch mit einem 2×40 bzw. 4×20 LCD
Eine Frage:
Verstehe ich das richtig, dass die CPU nur auf 8 MHz laufen darf?
Was muss ich ändern, damit ich Vollgas geben kann?
du musst nichts ändern. 8MHz hat der externe Quarz, aber intern läuft die CPU per PLL mit 168MHz.
Hallo,
erst einmal vielen Dank für die tollen Libraries.
Hier hätte ich nur kurz die Frage, ob die Lib auch für ein DOT Matrix Display mit 4×20 Zeichen (HD44780 ) geeignet ist.
Vielen Dank.
Gruß
Andreas
ja, das steht oben im Text in der zweiten Zeile.
Ou man, habe ich glatt übersehen.
Trotzdem vielen Dank für die Antwort.
Hi,
bei mir hat es bei einem 4×20 Dot Display leider nicht geklappt. Ich konnte die Zeile 3 bzw. 4 nicht erreichen, auch nachdem die defines auf
eingestellt habe.
Bei y=2 springt es auf Zeile 1, bei y=3 springt es auf Zeile 2.
Habe das Problem durch umschreiben der Cursor Funktion in den Griff bekommen. Vielleicht hilft es ja jemanden weiter.
void P_LCD_2x16_Cursor(uint8_t x, uint8_t y)
{
//uint8_t wert;

if(x>=TLCD_MAXX) x=0;
if(y>=TLCD_MAXY) y=0;

/*
wert=(y<<6);
wert|=x;
wert|=0×80;
P_LCD_2x16_Cmd(wert);
*/

if(y==0)
P_LCD_2x16_Cmd( (1<<7) + x);
else if(y==1)
P_LCD_2x16_Cmd( (1<<7) + 0×40 + x);
else if(y==2)
P_LCD_2x16_Cmd( (1<<7) + 0×14 + x);
else if(y==3)
P_LCD_2x16_Cmd( (1<<7) + 0×54 + x);
}
Gruß
Jochen
Hi, I’m trying to use custom caracters, but i’m failing. I get the caracter, but no matter what, the first 4 pixels (from left to right) of the first row are always on. Any clue?I did it with another library but I’d like to add the function to this library
Could be something like this?
#define CGRAM 0×40 #define DDRAM 0×80 void CreateCaracter(uint16_t RegPos, uint16_t X, uint16_t Y, uint16_t bytes[]) { int i; P_LCD_2x16_Cmd(CGRAM+RegPos);//Select register of CGRAM to save byte for(i=0; i<8;i++)//Copy bite for bite to register { P_LCD_2x16_Data(bytes[i]); } P_LCD_2x16_Cmd(DDRAM+X+Y);//Select place of DDRAM and position in the LCD P_LCD_2x16_Data(RegPos);//Shows data alocated in the register }please download new version 1.1
1. define an array for 8 bytes and set pixeldata
2. store user char as char (0…7)
3. print char on display